

Table of Contents
- What You'll Need Before You Wash Graphic Tees
- Step-by-Step: How to Wash Graphic Tees Properly
- Best Laundry Detergent for Graphic Tees
- Air Drying vs Machine Drying Graphic Tees
- Print-Specific Care by Printing Technology
- How to Fix a Cracked Graphic on a Shirt
- Common Mistakes to Avoid When Washing Graphic Tees
- Conclusion
Last Updated: August 26, 2026
What You'll Need Before You Wash Graphic Tees
Knowing how to wash graphic tees properly starts before you ever open the washer lid. The supplies you gather and the habits you form at this stage determine whether your favorite shirt looks crisp after fifty washes or starts flaking after five.
Here's what to have on hand:
- A mild, dye-free liquid detergent formulated for delicate fabrics
- Cold water access (most modern washers handle this automatically)
- A mesh laundry bag for extra protection during the spin cycle
- A clean drying rack or padded hanger for air drying
- A stain-treatment product that is bleach-free and color-safe
At FurEver Tees, we design our graphic tees to last, but even the most carefully printed shirt needs proper care to hold its color and detail over time. The good news is that none of this requires special equipment. It just requires a few deliberate choices.
One thing most guides skip: check the garment care label before doing anything else. The label tells you the fabric composition, which matters more than people realize. A cotton blend and a synthetic fiber shirt can look identical but behave very differently in the wash. Knowing what you're working with shapes every decision that follows.
Step-by-Step: How to Wash Graphic Tees Properly
Washing a graphic tee correctly takes about the same amount of time as washing it incorrectly. The difference is entirely in the sequence. Follow these steps and you'll dramatically extend the life of the print.
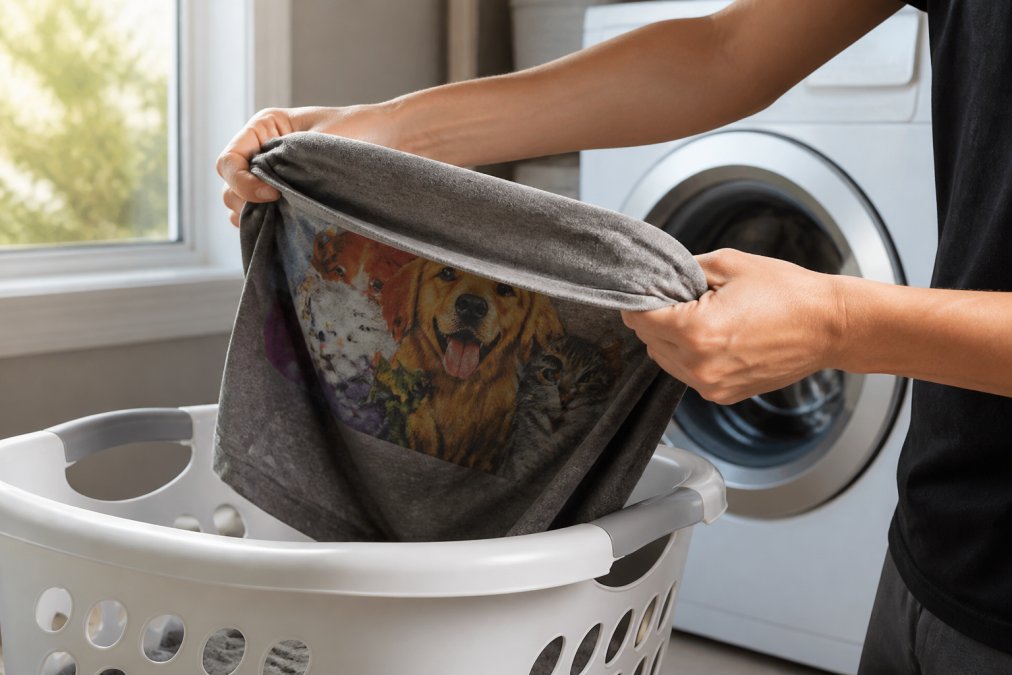
Step 1: Sort Your Laundry by Color
Sort your wash load before anything else. Graphic tees, especially new ones, can bleed dye during the first several washes. Washing a dark-colored shirt with light garments risks color transfer that is difficult or impossible to reverse.
Group darks with darks, lights with lights, and brights with brights. If a shirt is new and deeply saturated in color, wash it separately the first time. This is especially important for shirts with large, bold graphic areas where the dye concentration is highest.
Step 2: Turn the Shirt Inside Out
This is the single most effective thing you can do to protect a graphic print. Turning the shirt inside out shields the print from direct friction against other garments, the drum of the washing machine, and the abrasive action of agitation. That friction is the primary cause of print cracking and fading over time.
Turn every graphic tee inside out before it goes into the wash. Make it automatic. The back of the shirt takes the mechanical punishment instead of the front, and the print stays sharp.
Step 3: Select Cold Water and a Gentle Cycle
Cold water is non-negotiable for graphic tees. Heat is the enemy of printed fabric. Hot water causes the ink to expand and contract, which accelerates cracking and fading. It also shrinks cotton blend fabrics and breaks down synthetic fibers faster than cold water does.
Set your washer to the gentle or delicate cycle. This reduces agitation and spin speed, which means less mechanical stress on the print and the fabric. A gentle cycle combined with cold water is the foundation of proper graphic tee laundry care.
Step 4: Pre-Treat Stains Without Touching the Print
Stain removal on a graphic tee requires precision. Apply your stain-treatment product only to the stained area, and keep it away from the printed portion of the shirt. Many stain removers contain optical brighteners or mild bleaching agents that will strip or discolor the ink even when they're not labeled as bleach.
Pre-treat the stain, let it sit for the time the product recommends, then wash as normal. If the stain is on or near the print itself, flip the shirt inside out and apply the treatment from the reverse side, working it gently through the fabric. This protects the ink layer while still lifting the stain.
Best Laundry Detergent for Graphic Tees
The best laundry detergent for graphic tees is a mild, liquid formula with no optical brighteners, no bleach, and no heavy fragrance additives. Powder detergents can leave residue that sits in the ink layer and accelerates cracking. Detergents marketed for "brights" or "whitening" almost always contain optical brighteners, which react with UV light and can alter the color of your print over time.
Look for detergents labeled as gentle, free-and-clear, or formulated for delicate fabrics. These clean effectively without the aggressive chemical agents that degrade printed designs. According to the American Cleaning Institute's fabric care guidance, using the right detergent type for the garment is one of the most impactful factors in long-term textile preservation.
Avoid fabric softener entirely when washing graphic tees. Fabric softener coats the fibers with a waxy residue that builds up over time and causes the print to lose adhesion to the fabric. The shirt may feel softer temporarily, but the print will start peeling and cracking much sooner than it should.
| Detergent Type | Safe for Graphic Tees | Notes |
|---|---|---|
| Mild liquid (dye-free, fragrance-free) | Yes | Best option for garment longevity |
| Powder detergent | Caution | Can leave residue in ink layer |
| "Brightening" or "whitening" formula | No | Contains optical brighteners that alter print color |
| Bleach-based detergent | No | Destroys ink and fades fabric |
| Fabric softener | No | Causes print adhesion failure over time |
Air Drying vs Machine Drying Graphic Tees
Air drying wins. This is not a close comparison. Machine drying exposes graphic tees to sustained heat, which is the single biggest accelerant of print cracking, fading, and fabric shrinkage. Even a low-heat tumble dry setting generates enough warmth to degrade the ink bond over repeated washes.
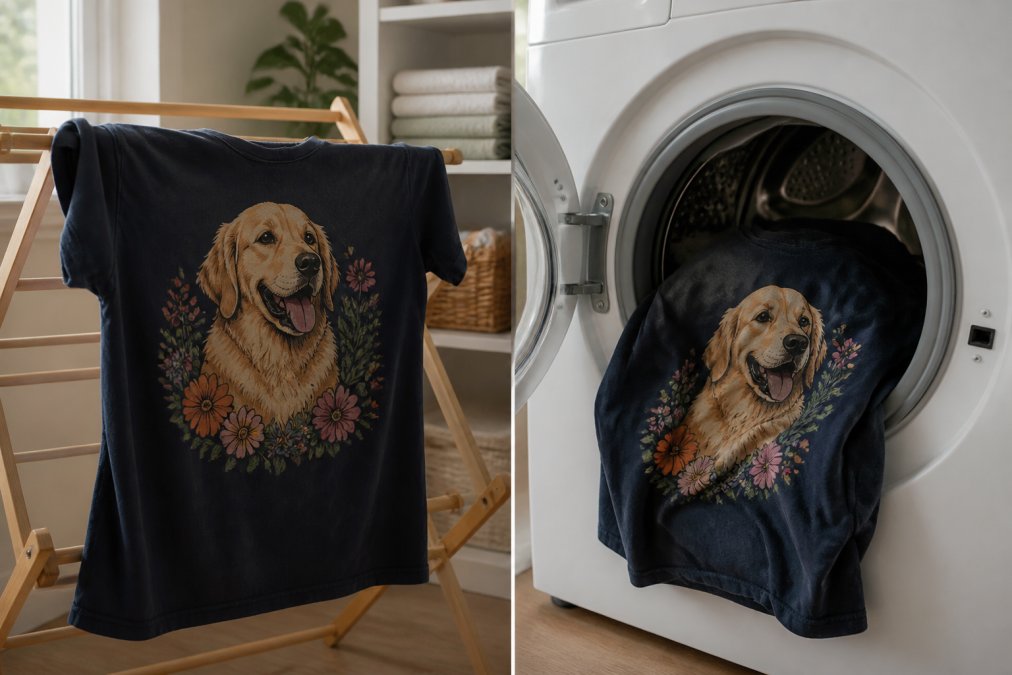
Hang your graphic tees on a drying rack or lay them flat to dry. If you hang them, use a padded hanger to avoid shoulder distortion. Keep them out of direct sunlight, which can fade both the fabric and the ink over time. A shaded, well-ventilated area is ideal.
If you absolutely must use a dryer, use the lowest heat setting available and remove the shirt while it is still slightly damp. Finish drying it flat or on a hanger. This limits heat exposure while still getting the job done. The ASTM International textile care standards consistently identify heat as the primary driver of premature garment wear, which is exactly why air drying is the standard recommendation for printed apparel.
The practical tradeoff is drying time. Air drying typically takes two to four hours depending on humidity and airflow. That's a real inconvenience for some people, but it's worth it for shirts you actually care about.
Print-Specific Care by Printing Technology
Most guides treat all graphic tees the same. They're not. The printing technology used to create the design determines how the ink bonds to the fabric, how it responds to heat and agitation, and how long it lasts under regular laundry care. Understanding the difference changes how you approach washing.
Screen-Printed Tees
Screen printing deposits a thick layer of plastisol or water-based ink directly onto the fabric surface. This creates the classic, slightly raised feel you'll notice when you run your finger across the design. Screen-printed graphics are generally durable, but that ink layer is vulnerable to friction and heat.
For screen-printed tees, the inside-out rule is especially important. The raised ink surface catches on other garments during agitation, which is where micro-tears in the print begin. Cold water, a gentle cycle, and air drying will keep a quality screen-printed shirt looking sharp for years.
DTG (Direct-to-Garment) Printed Tees
DTG printing uses inkjet technology to print directly into the fabric fibers rather than on top of them. The result is a softer, more detailed print that handles fine lines and photographic images better than screen printing. The tradeoff is that DTG prints can be more sensitive to washing conditions, particularly in the first few washes before the ink fully cures.
For DTG-printed tees, wash inside out in cold water on a gentle cycle. Avoid pre-soaking, which can cause the ink to lift before it has fully bonded. Many DTG prints benefit from being washed alone the first time, as the initial wash can release a small amount of excess ink.
Heat Transfer and Vinyl Prints
Heat transfer and vinyl prints sit on top of the fabric rather than bonding into it. This makes them the most sensitive of the three technologies to both heat and agitation. The edges of vinyl graphics are particularly prone to peeling if the shirt is washed at high temperatures or dried in a machine repeatedly.
For heat transfer and vinyl prints, cold water is mandatory rather than just recommended. Skip the dryer entirely if you can. If the edges of the vinyl begin to lift slightly, avoid picking at them, this accelerates the peeling. Instead, place a thin cloth over the design and press gently with a warm iron from the inside out to re-adhere the edge.
How to Fix a Cracked Graphic on a Shirt
A cracked graphic on a shirt is not automatically a lost cause. Minor cracking in screen-printed or heat transfer designs can often be improved, though the realistic goal is stabilization rather than full restoration.
For minor surface cracking on a screen-printed tee, turn the shirt inside out and apply a thin layer of fabric medium (available at craft stores) to the reverse side of the cracked area. This rehydrates the dried ink and can reduce the appearance of fine cracks. Allow it to dry completely before wearing or washing.
For peeling vinyl or heat transfer prints, a household iron set to low heat can re-adhere lifting edges. Place a thin pressing cloth between the iron and the shirt, apply gentle pressure for ten to fifteen seconds, and allow to cool before touching. This works best on edges that have just begun to lift rather than sections that have already separated significantly.
According to the Craft and Hobby Association's textile care resources, heat-reactivated adhesives in heat transfer prints can regain bonding strength when correctly re-pressed, making this a genuinely effective fix for early-stage peeling.
The honest answer is that prevention is far more effective than restoration. A print that has cracked extensively across a large area cannot be fully repaired at home. The better investment is in washing correctly from the start.
Common Mistakes to Avoid When Washing Graphic Tees
The most common mistakes when people wash graphic tees aren't dramatic errors. They're small, habitual choices that compound over time.
Washing in warm or hot water. Many people default to warm water because it feels more thorough. For graphic tees, it accelerates ink breakdown and fabric shrinkage without improving cleanliness.
Skipping the inside-out step. It takes five seconds and makes a significant difference. Most people skip it because they're in a rush. The print pays the price over the next dozen washes.
Using too much detergent. More detergent does not mean cleaner clothes. Excess detergent leaves residue in the fabric that traps dirt and stiffens the ink layer. Follow the detergent's recommended amount for the load size.
Leaving the shirt in the dryer too long. Even people who know to use low heat often forget to pull the shirt out while it's still slightly damp. Overdrying causes the same heat damage as high-heat drying, just more slowly.
Ironing directly over the print. If a graphic tee needs ironing, always iron inside out or place a pressing cloth between the iron and the design. Direct heat from an iron will melt or flatten the ink layer.
Washing with harsh items. Denim, zippers, and rough fabrics create friction that damages prints during the wash cycle. Keep graphic tees with similar soft fabrics or use a mesh laundry bag to isolate them.
A useful resource for understanding how different washing conditions affect fabric longevity is the Textile Care Allied Trades Association's care labeling guidance, which outlines how heat, agitation, and chemical exposure interact with different fabric types.
The pattern behind all of these mistakes is the same: treating a graphic tee like a regular piece of laundry. It isn't. The print is a separate material layer with its own needs, and those needs are different from the fabric underneath.
Frequently Asked Questions
Should graphic tees be washed inside out?
Yes, always turn graphic tees inside out before washing. This reduces direct friction against the print during agitation in the wash cycle, which is one of the leading causes of fading and cracking over time. Washing inside out also protects the outer fabric surface from abrasion against other garments, helping the colors stay vibrant and the design stay intact through many more washes.
Does hot water damage graphic tees?
Hot water causes real damage to graphic tees. High wash temperatures break down the ink or transfer adhesive used in the print, leading to cracking, peeling, and color loss much faster than cold water would. Heat also causes cotton-blend fabrics to shrink, which stretches and distorts the graphic. Cold water, at or below 60°F, is the right choice every time you wash a graphic tee you want to preserve.
Can you use fabric softener on graphic tees?
Fabric softener is best avoided on graphic tees. The conditioning agents coat fabric fibers, which sounds harmless, but that coating weakens the bond between the ink and the fabric over repeated washes. This accelerates fading and can cause screen-printed or DTG designs to crack sooner. If softness matters to you, try a short, low-heat tumble dry cycle instead of relying on liquid fabric softener or dryer sheets.
How do you remove stains from graphic tees without damaging the design?
Apply a small amount of mild liquid detergent or a gentle stain remover directly to the stained area, keeping it away from the printed graphic if possible. Let it sit for five to ten minutes, then rinse with cold water before placing the shirt in the wash. Avoid scrubbing the print directly or using bleach-based products, which degrade ink and damage synthetic fibers in the design. Always wash inside out after pre-treating.
Keeping a graphic tee looking its best long-term comes down to consistency with a handful of simple practices: cold water, inside out, gentle cycle, air dry. The shirts that fall apart after a few washes almost always had those steps skipped. At FurEver Tees, every design is built to hold up to regular wear and proper washing, our pet-inspired graphics are meant to be worn, not stored. Shop the FurEver Tees collection and get a shirt worth taking care of.
This article was written using GrandRanker